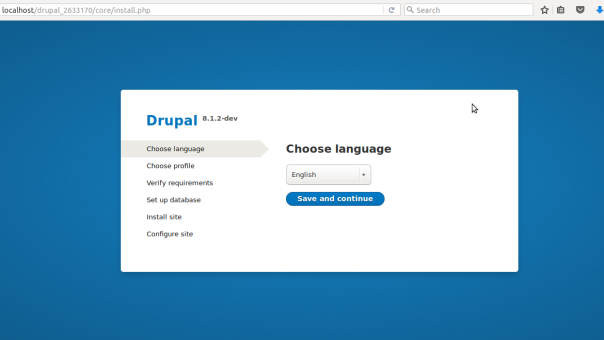
Hello there, I’m here to tell you how to install Drupal localhost. Before installing it, let’s know something briefly about Drupal.

DRUPAL :
Drupal is an open source content management system(cms) written in PHP. Drupal provides a back end framework for websites. Drupal also describes itself as a web application framework.
Now, to be a part of drupal we need to sign up into drupal. After signing up, sign up into Drupal ladder. Drupal ladder contains lessons and materials to help people learn about and contribute to Drupal.
Prerequisites for building drupal localhost:
- Git
- LAMP
- Composer
At first, you need to install git in your computer.
$ sudo apt-get install git-core
Generally, sudo command is used to allow the user that is created during
install to run all administrative commands.
LAMP :
LAMP is an acronym of Linux, Apache, MySQL and PHP which is a open-source software. LAMP is suitable for building dynamic websites and web applications.
To install LAMP in your computer with just one command,
$ sudo apt-get install lamp-server^ phpmyadmin
Be careful about this character(^). For downloading each and every component of LAMP, use this website LAMP . Let’s have a brief explanation about the components in LAMP.
-
Apache
- Apache is the most widely used web server software. Apache is an open source software available for free. It is like a connection between MySQL and PHP.
-
MySQL
- MySQL is a relational database management system. It runs as a server and allows multiple users to manage and create numerous databases. It is a central component in the LAMP stack of open source web application software that is used to create websites.
-
PhpMyAdmin
- PhpMyAdmin is a free and open source administration tool for MySQL and it is used to create and modify data.
After installing LAMP successfully, start your terminal and navigate to your web server’s directory. Enter this command
$ cd /var/www
We need to install the composer. Composer is an application for the PHP programming language that provides dependencies of PHP software and libraries required.
For installing composer follow the following commands-
Install the curl utility:
$ sudo apt-get install curl
Download the installer:
$ sudo curl -s https://getcomposer.org/installer | php
Move the composer.phar file:
$ sudo mv composer.phar /usr/local/bin/composer
Next, run the following command in the terminal to clone Drupal8.5x in drupal8 folder.
$ git clone –branch 8.5.x http://git.drupal.org/project/drupal.git drupal8
After cloning it, enter into drupal8 folder and update the composer.
$ cd drupal8
$ composer update
Copy the ‘default.settings.php’, rename it ‘settings.php’ and paste it in the same folder.
$ cp default.settings.php settings.php
To make the files writable use the following command-
$ sudo chmod 777 settings.php
Here, chmod command is used to make the files writable. As it happened with me if your phpMyAdmin shows as not found, just follow these steps.
$ cd /etc/apache2/
Include this ‘Include /etc/phpmyadmin/apache.conf’ in
$ nano apache2.conf
and then restart the apache2.
$ /etc/init.d/apache2 restart
Open localhost/phpmyadmin in any web browser and you get a page like this.

Click ‘Database’ on the top left and enter the name of the new database as ‘drupal8’. Set your password for MySQL for the “root” user by going to the ‘User Accounts’ tab in phpmyadmin as shown above.
Now, we are all set to install Drupal on our local server.
Navigate to localhost/drupal8.
